Table of contents
- How to use Formify?
- How does Formify work?
- How to run Formify locally
- 1. Clone the Formify Github repo
- 2. Install the dependencies
- 3. Set the environment variables as given in .env.example and rename the file to .env
- 4. After all the above environment variables are set, run the below command(s).
- 5. Once all the above steps are done, start the dev server by running the following command
- Features missing in Formify
- Future updates in Formify
- Problems faced while making Formify
We developers often create different projects in the form of websites. These days static sites have become more popular and serve static content without interacting dynamically with the server.
Having a contact form on static sites involves a bit of extra work.
Imagine if we create sites or projects quite often and adding contact forms through third-party services could be cumbersome. We often ignore adding contact or feedback forms on most of our sites to avoid the hassle of setting forms.
So if there's a tool that lets us embed contact forms on any number of sites without writing code and just in a few steps, how great would it be?
That's precisely where Formify addresses this problem on the occasion of the PlanetScale and HashNode hackathon.
Formify is a tool that lets you create, manage and embed forms on sites without writing any code and it is created as a part of PlanetScale x HashNode hackathon.
How to use Formify?
In order to use Formify, visit formify.vercel.app and signup using email and password or using a Google account.
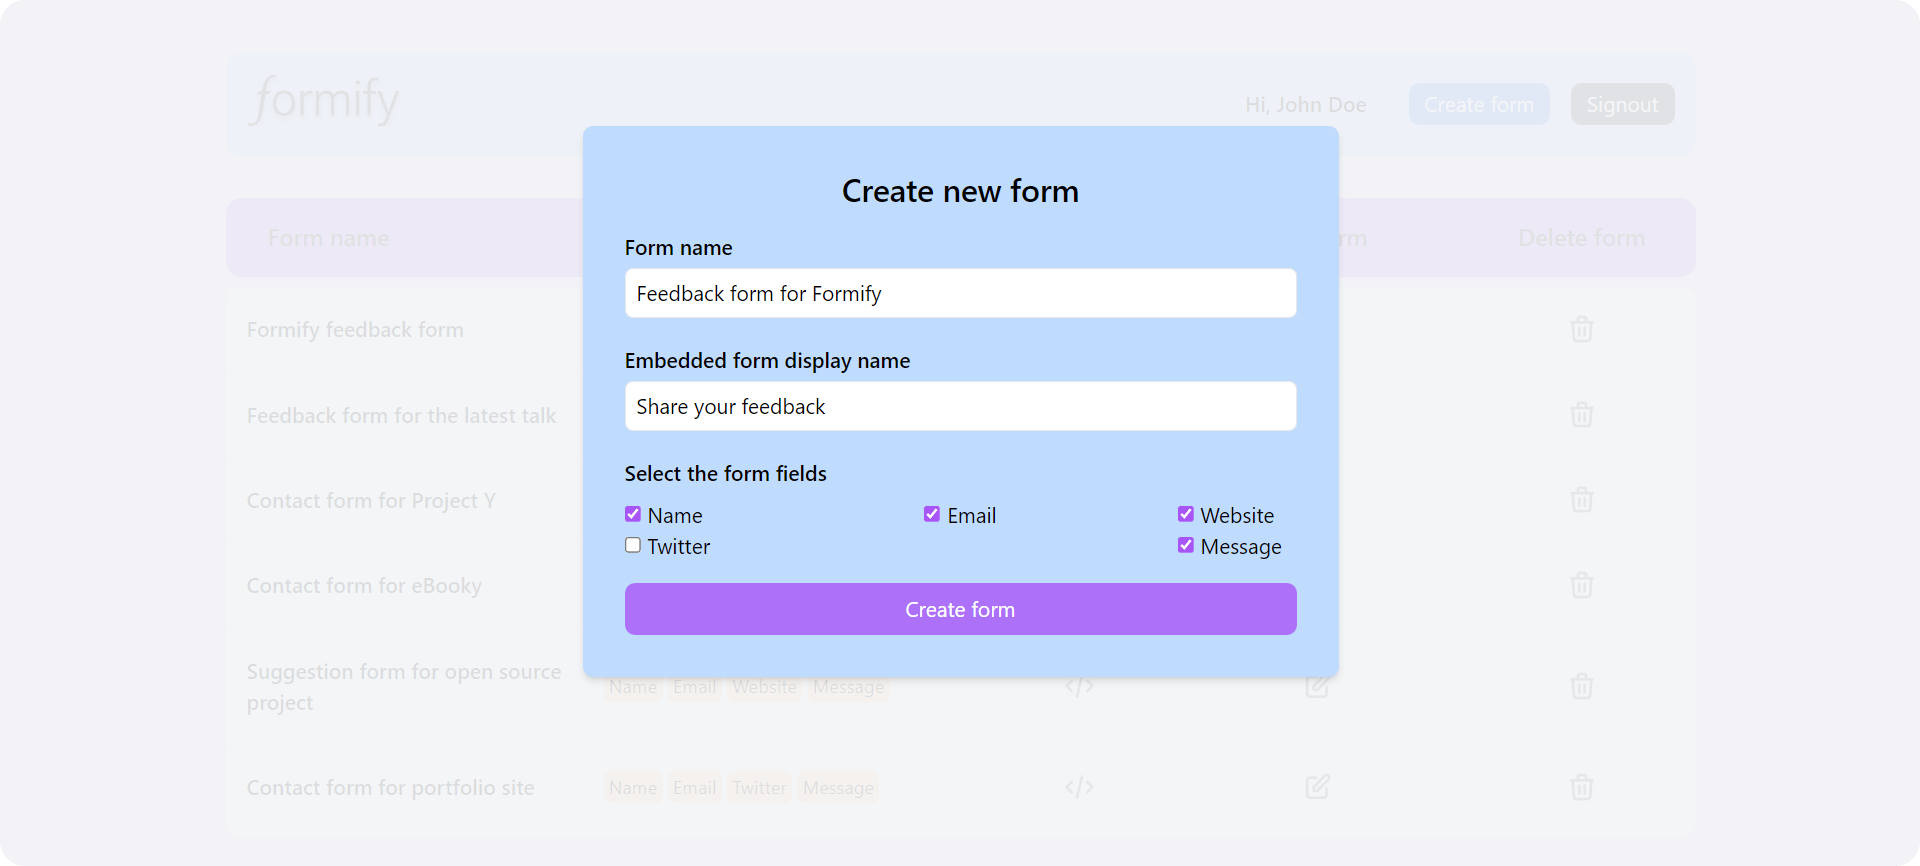
After signing into Formify, click the Create form button and enter the name of the form, the display name(this is shown as the form title when embedded on websites), select the fields and then click the create button.
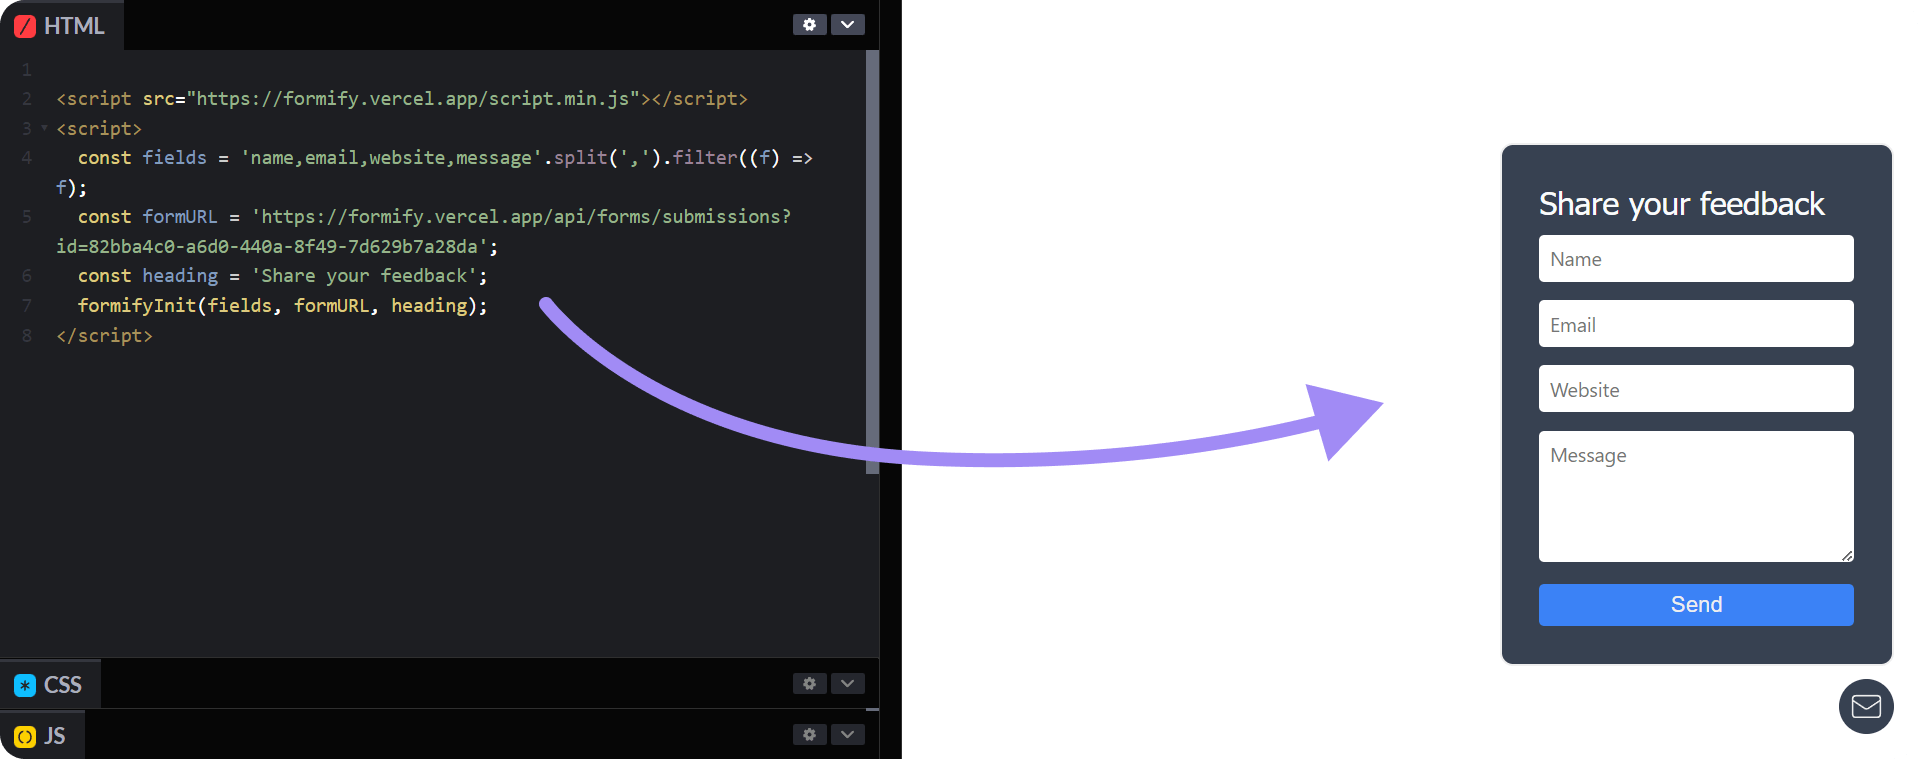
Once the form is created, copy the script code by clicking the code icon and paste the copied script into the head or body tags of your HTML file.
Voila, you can see the form icon at the bottom right corner of your site, and anybody can fill the data in that form and submit it.
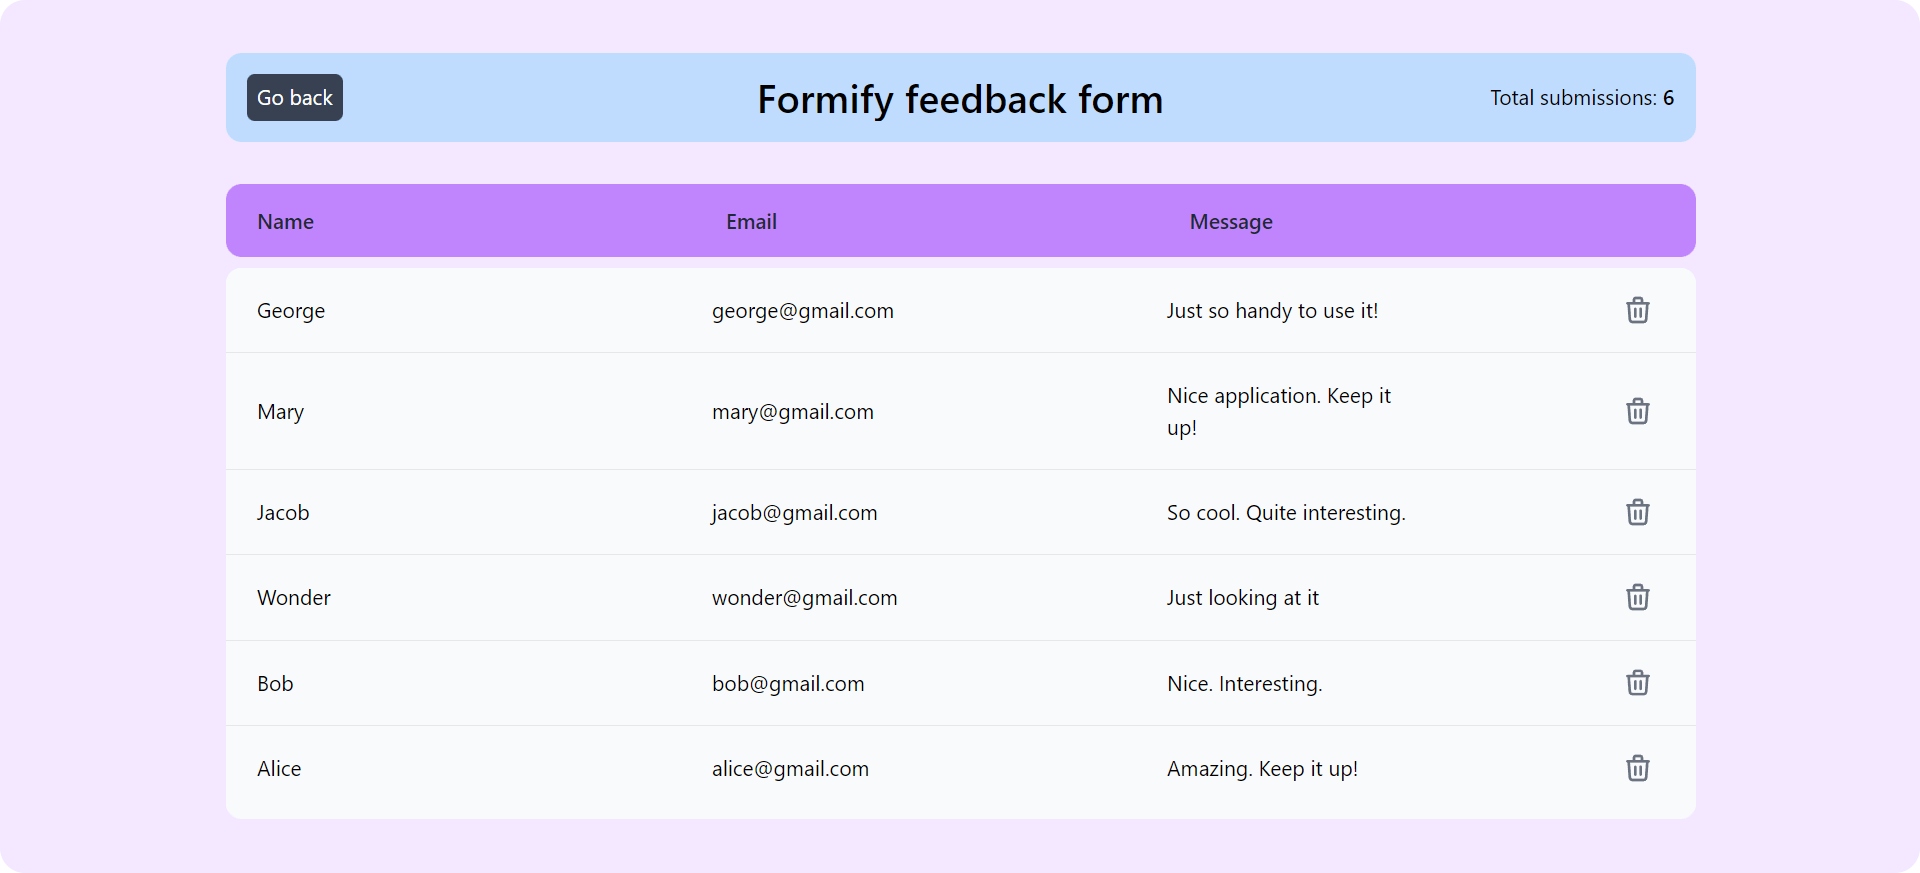
You can see the form submissions by clicking the form in the dashboard of the formify site.
In a similar manner, you can create forms for various purposes and for various projects just in a few steps.
Here is the live demo of it[new update]:
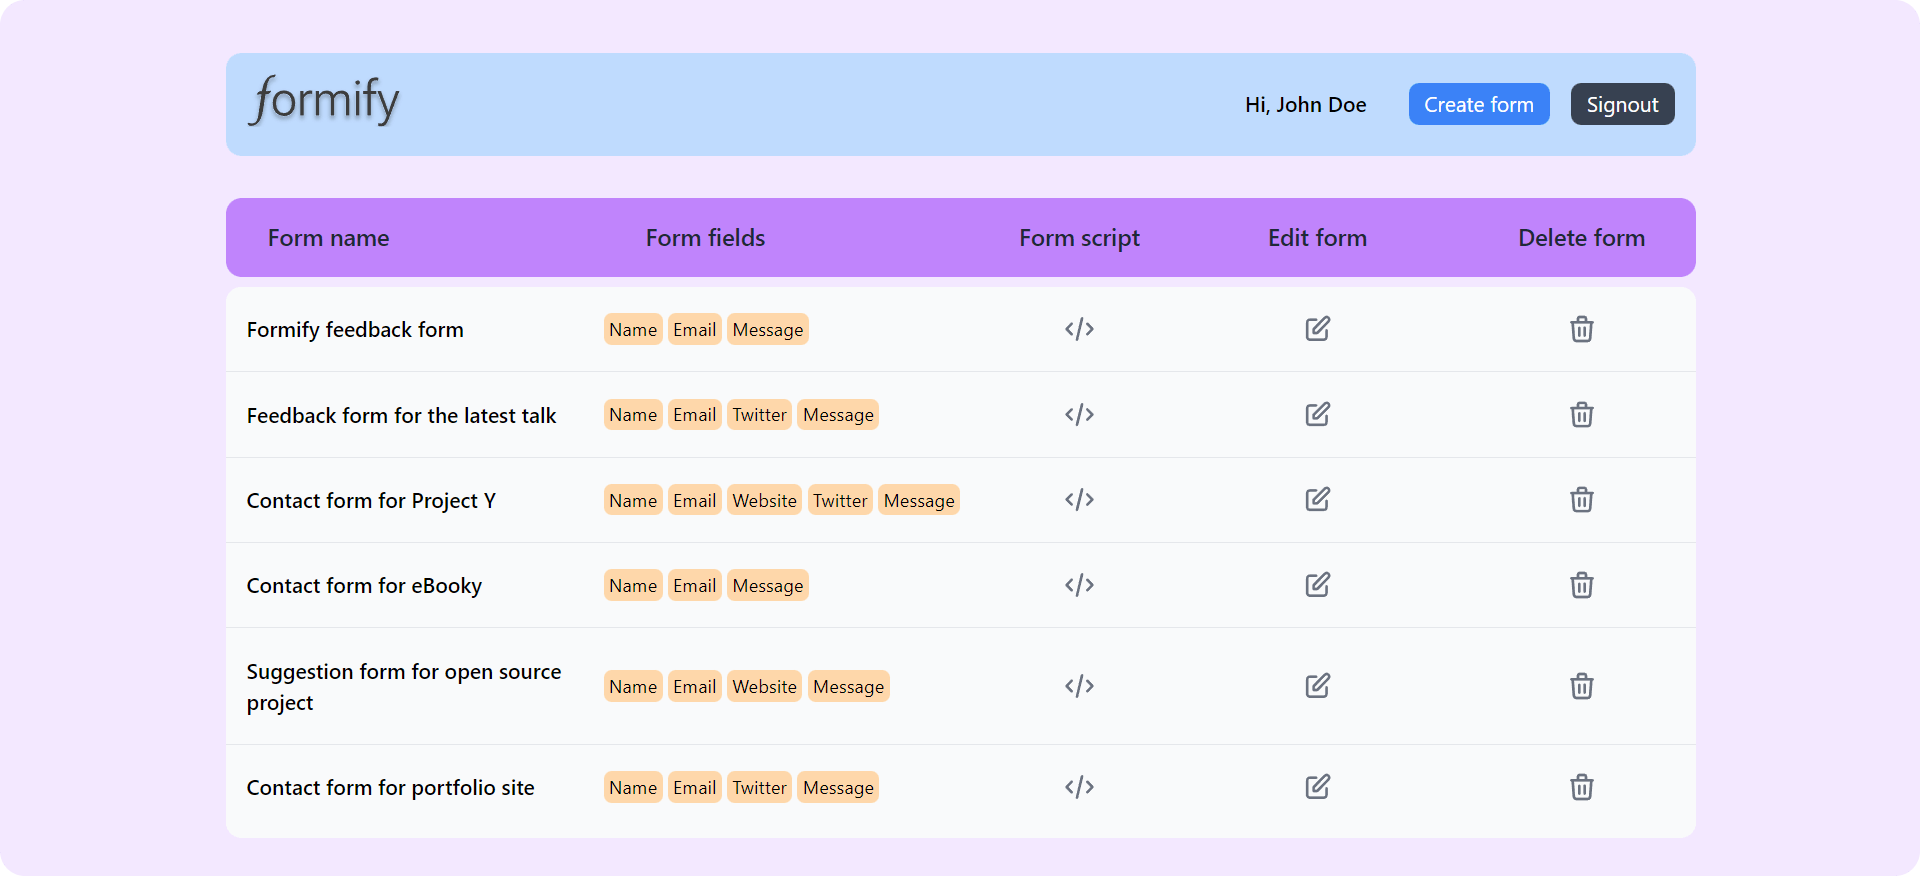
This is how one can use Formify to manage different forms for different sites. A sample image of a dashboard with various forms on Formify can be seen below.
Now let's dive into the details of working and creating Formify.
How does Formify work?
Before going into the working of Formify let's see the tech stack involved.
Tech stack
- NextJS
- TypeScript
- PlanetScale MySQL database
- Prisma ORM
- Tailwind CSS
The above ones are the main ingredients of the Formify application. There are a few other things involved like JWT, Bcrypt, Axios etc which are generally considered part of the above stack so I'm not listing them separately.
Working of Formify
Formify uses NextJS's API feature to handle the login and fetching of data. The frontend is server-side rendered(SSR) using the getServerSideProps feature of NextJS.
To interact with the database Prisma client is used and it runs on the server in the APIs section.
How to run Formify locally
In order to set up the Formify codebase locally, you need to follow the below five steps
1. Clone the Formify Github repo
git clone https://github.com/Basharath/Formify.git
Change the directory to Formify
cd Formify
2. Install the dependencies
npm install
3. Set the environment variables as given in .env.example and rename the file to .env
PLANETSCALE_PRISMA_DATABASE_URL=mysql://<USERNAME>:<PLAIN_TEXT_PASSWORD>@<ACCESS_HOST_URL>/<DATABASE_NAME>?sslaccept=strict
JWT_PRIVATE=<Secret key>
SERVER=<URL of the site>
NEXT_PUBLIC_GOOGLE_CLIENT_ID=<Google auth client ID>
- To get
PLANETSCALE_PRISMA_DATABASE_URLsign up and create a database on planetscale.com and get the connection URL for Prisma - Put any secret text for
JWT_PRIVATEwhich is used to sign JWT tokens SERVERis the URL of the site you will be creating. This is used to give the location for the script that will be used to embed forms on websites.- To get
NEXT_PUBLIC_GOOGLE_CLIENT_IDvisit Google cloud credentials and create new credentials for the website and get the client ID.
4. After all the above environment variables are set, run the below command(s).
npx prisma db push
npx prisma generate  # This runs automatically in the previous command
This pushes the Prisma schema to the database and generates schema types to use with the Prisma client.
5. Once all the above steps are done, start the dev server by running the following command
npm run dev
That's all, the Formify app starts running locally with your set database and other details at localhost:3000.
Note: To auto format, the code and Prisma schema install Prettier and Prisma VS code extensions.
Features missing in Formify
- Email notification whenever any submission happens
- Custom field properties
- Direct support for form embeds as React components [Added]
- Email verification when signed up using email and password
- Exporting form data
Future updates in Formify
- Updating/replacing the signup process involving email and password with a magic link or adding more auth providers, so there won't be any unverified emails.
- Adding direct support to embed forms in react-related sites as components. [Done]
- Enhance the form script and add multiple color themes for users to select.
- Update the landing page to make it more appealing to the users
- Refactor the code and remove duplicates, improve the readability and maintainability
- Add user confirmation popups before deleting the forms.
- Update the Github readme file and add contributing guidelines
To embed Formify form in react-based sites install the formify-form library and use it as shown below.
import { Form } from 'formify-form';

const App = () => {
  return (
    <div>
      <Form
        formFields={['name', 'email', 'message']}
        formURL='https://formify.vercel.app/api/forms/submissions?id=<ID from formify>'
        formTitle='Share your feedback'
      />
    </div>
  );
};
Problems faced while making Formify
The idea to create Formify occurred to me when I wanted to participate in the PlanetScale x HashNode hackathon. The bad part is that I came to know about the hackathon in its last week and I had no project idea in mind as per the hackathon specs.
After recollecting the problems that I generally encounter while making projects, I got the idea of creating embedded forms for websites with no code.
Initially, when setting up the project I was not clear on how to go about it as I had limited time of 6-7days. I had different questions about creating both frontend and backend separately or mixing both, how to handle authentication, how to create embedded form and whether will it work as expected or not etc.
I spent the first two days roughly trying out the idea and testing it out. The main idea was to be able to make any site have a nice contact/feedback form without writing code.
After making APIs with the help of the NextJS API feature and without making the UI ready, I created forms and then created script code that can be added to any site.
Once the script code is ready I tested it on multiple platforms like Stackblitz, Codepen, etc and the contact forms appeared so good and worked as expected.
Soon after that, I started to make the complete full-stack application and in that process, I left some code without refactoring and some duplicate codes are not converted into components as I did have not much time left to submit the project to the hackathon. I gave more preference to creating a working application first and then thought to refactor it later.
In the next updates, I'll be updating a lot of the code to improve the readability and maintainability.
I hope this project will help people to manage contact forms on their sites. I'm also considering making this application a very full-fledged product if I get support for this project in the future.
Project link: https://formify.vercel.app/
Github link: https://github.com/Basharath/Formify
Please share your thoughts or suggestions about Formify and share how you were formifying(having forms) on your static sites :)
